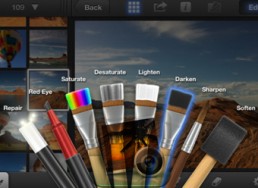
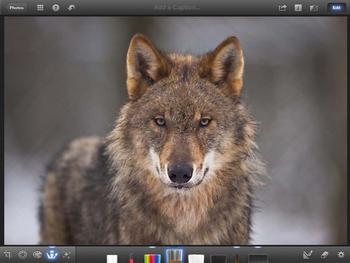
 Brushes, iPhoto’s retouching toolkit, allows you to paint effects directly on to specific areas of your photos. It won’t let you introduce new elements, but instead it enables you to deepen shadows, sharpen edges or pick out details to get your photography picture perfect.
We like Brushes best when used at a fairly low intensity: we’ve found that when they are turned up to maximum strength, the results quickly look artificial and it becomes obvious that an image has been doctored. It also has to be said that some effects are more effective than others: although the
Red-Eye brush is straightforward and self-explanatory, we found its results were patchy and sometimes verged on the bizarre. Similarly, the Repair brush, which appears to be heaven-sent for removing unwanted elements, is far from fail-safe: when used for larger areas, it led to visible blurs on the photos.
Red-Eye brush is straightforward and self-explanatory, we found its results were patchy and sometimes verged on the bizarre. Similarly, the Repair brush, which appears to be heaven-sent for removing unwanted elements, is far from fail-safe: when used for larger areas, it led to visible blurs on the photos.
Still, this is a powerful toolset which, when used with care and restraint, allows you to bring out the very best in your photos, whether they are arty images or casual snapshots.
Vital Info
Device: iPhone/iPad
Difficulty: Intermediate
Time required: 1 hour
Difficulty: Intermediate
Time required: 1 hour
What you need:
Step 1: The magic fix
The Repair brush enables you to remove elements from your image: iPhoto uses the surrounding pixels to guess what should replace it, so here, a distracting flower has been removed from the foreground. It’s useful, but works best when used on small areas away from the focal area of the photo.
Step 2: Ramp up the colour
You should use colour to make the most important elements of your image stand out with the Saturate and Desaturate brushes. In this image, we’ve picked out the central model by painting saturation on to her face and chest, while fading the background figures using Desaturate.
Step 3: In the shadows
Here, we’ve heightened the contrast between the ballerina and the backstage area, building up the shadows with the Darken brush and then highlighting key areas of the ballerina using Lighten. These brushes only heighten existing lighting, so Darken won’t eliminate the bright vertical stripe.
Step 4: In focus
The Sharpen tool helps to correct errors that are in focus. It’s one of the more subtle brushes and won’t rescue blurry or out-of-focus photos, but it’s useful for picking out details. Meanwhile, the Soften brush smooths out areas of an image – here we’ve used it to lessen wrinkles on the curtain.
Step 5: Red alert
The Show Brush Strokes option in the cog icon is a handy way of keeping track of what you’ve done in each brush: if you’re in the Desaturate brush, for example, it will show all the areas you have painted with that brush. There’s also an option for applying effects to the whole image.
Step 6: Show your brushwork
As you use each brush, a dot will appear above it in the Brushes palette. You can turn off all your brush strokes with a particular effect by double-tapping on the dot. While this is useful for tracking the impact of various tools, we found this very precise double-tap fiddly to master.


No comments:
Post a Comment